Showing posts with label coordinate measuring machine. Show all posts

Coordinate Metrology Society Launches Level-One Certification Program for Portable 3D Metrology


First Examinations to be held at 2013 Coordinate Metrology Systems Conference 
San Diego, CA – April 22, 2013 – The Coordinate Metrology Society (CMS), the eminent membership association for measurement professionals, today announced the launch of the industry’s first Level-One Certification for Portable 3D Metrology.
The first examinations will be held at the 29th annual Coordinate Metrology Systems Conference (CMSC), July 22 – 26, 2013, at the Sheraton San Diego Hotel and Marina. Applicants for the Level-One Certification must submit an application, meet eligibility requirements, sign the CMS code of ethics, and pass a peer review. Qualifying candidates will be notified and scheduled for an examination seat at CMSC 2013. The cost for a CMS member to take the Certification exam is $400, non-member pricing is also available. Certification program guidelines and application forms are available on the CMS website at https://www.cmsc.org/cms-certification. 
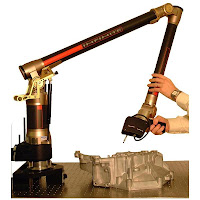
The CMS Certification credential aids in quantifying an employee’s knowledge of metrology, which is essential to ISO certified manufacturers and companies with Quality Management Systems. The Certification exam is currently comprised of two assessments. The Level-One examination is a proctored, online assessment consisting of about 200 multiple choice questions covering foundational theory and practice common to most portable 3D Metrology devices. The Level-Two exam on a portable CMM (coordinate measuring machine) is being piloted at the 2013 CMSC. This is a practical performance assessment. The candidate must use a metrology instrument to collect a series of measurements on an artifact, then analyze specific features of that artifact.  
“Portable 3D Metrology is being integrated into manufacturing processes at a rapid rate,” states Randy Gruver, chair of the CMS Certification Committee. “The Coordinate Metrology Society determined a clear need for a Certification program based on a graying workforce and the increasing need for metrology expertise. Data collection technologies that were once the domain of scientists, engineers and mathematicians, are now being used by technicians and shop-floor personnel for industrial applications and beyond. The measurement equipment is calibrated and certified to performance standards, but the personnel operating this equipment are not accredited. There are many variables induced by an operator that can dramatically influence data collection. It is important for an employer to understand the knowledge level of an employee or a metrology service provider in this industry.”          
About the Coordinate Metrology Society 
The Coordinate Metrology Society is comprised of users, service providers, and OEM manufacturers of close-tolerance industrial coordinate measurement systems, software, and peripherals. The metrology systems represented at the annual Coordinate Metrology Systems Conference (CMSC), include articulated arm CMMs, laser trackers, laser radar, photogrammetry/videogrammetry systems, scanners, indoor GPS and laser projection systems. The Coordinate Metrology Society gathers each year to gain knowledge of the advancements and applications of any measurement system or software solution that produces and uses 3D coordinate data. For more information on this organization, visit their web site at http://www.cmsc.org
About the Coordinate Metrology Systems Conference 
The Coordinate Metrology Systems Conference (CMSC) is the world's premier event for Measurement Technology Professionals. This annual event is sponsored by the Coordinate Metrology Society. Established in 1984, the five-day conference is held each year at a different location, and attracts visitors from around the globe. CMSC is acclaimed for its comprehensive program of top-shelf white papers and applications presentations given by industry experts from science/research laboratories and manufacturing industries such as aerospace, space hardware, antenna, automotive, shipbuilding, power generation, and general engineering. No other trade show rivals the high level of authoritative information provided by CMSC members and master users of portable metrology instruments, software, and peripheral equipment for quality control, quality production, and precision assembly.

Hexagon Metrology Releases PC-DMIS Gear 2.5


North Kingstown, RI – February 14, 2013 – Hexagon Metrology today announced the release of PC-DMIS Gear 2.5, a sophisticated software module designed for basic and advanced gear measurement applications. The new version simplifies measurement routines by using a parameter-driven graphical interface to speed inspections of helical spur, bevel gears and pinions. PC-DMIS Gear 2.5 software is compatible with standard CMMs, eliminating the need to invest in separate gear measurement equipment. The software also runs on vision CMMs for inspection applications of small spur gears. PC-DMIS is an integrated metrology system used for developing inspection routines, measuring parts, managing data, evaluating and reporting results. PC-DMIS Gear 2.5 is developed by Hexagon Metrology, the largest software developer in the metrology industry. 
  
Expert and non-expert operators can quickly build gear inspection routines by first completing a rules-driven form, then choosing the desired inspection report(s) from a set of pre-defined, standard formats. The software then automatically generates the program and inspection reports. Users can also create measurement alignment and probe qualification routines to completely automate the inspection process. PC-DMIS Gear supports a wide range of international standards including AGMA 2000-A88, DIN 3962, JIS B 1702 and ISO 1328. 
  
“PC-DMIS Gear is a very cost-effective inspection method as compared to expensive, dedicated gear measurement equipment,” states Ken Woodbine, President of Hexagon Metrology’s software division. “The software interface has been enhanced and simplified ¾ even entry-level operators can run inspection routines accurately. Utilizing forms, wizards and pre-defined routines, users can calibrate probes, define datums, and measure and evaluate gears in record time.” 

  
About Hexagon Metrology 

Hexagon Metrology offers a comprehensive range of products and services for all industrial metrology applications in sectors such as automotive, aerospace, energy and medical. We support our customers with actionable measurement information along the complete life cycle of a product – from development and design to production, assembly and final inspection. 
  
With more than 20 production facilities and 70 Precision Centers for service and demonstrations, and a network of over 100 distribution partners on five continents, we empower our customers to fully control their manufacturing processes, enhancing the quality of products and increasing efficiency in manufacturing plants around the world. For more information, visit www.hexagonmetrology.us
  
Hexagon Metrology is part of Hexagon (Nordic exchange: HEXA B). Hexagon is a leading global provider of design, measurement and visualization technologies that enable customers to design, measure and position objects, and process and present data. 


NIKON METROLOGY BECOMES OFFICIAL PARTNER FOR METROLOGY TO PENSKE RACING


BRIGHTON, MI – September 11, 2012 - Nikon Metrology Inc. and Penske Racing today jointly announced a multi-year partnership agreement that makes Nikon Metrology the Official Supplier of Dimensional Metrology Products and Services to Penske Racing.
Penske Racing, known as the “New York Yankees of motorsports” with over 23 national championships, including 12 in Indy Car racing, is the standard for excellence in motorsports.  In its efforts to achieve continuous improvement, Penske Racing wanted to further enhance its advanced technology and manufacturing methods and the organization followed that to the conclusion of the need for a premier Metrology provider.  That search led to Nikon Metrology.

"When Penske Racing approached us, we recognized immediately the fit between two leaders in their respective fields," said Hajime Kosawa, Managing Director of Nikon Metrology, Inc.  "Our North American Technology Center in Brighton, MI has extensive experience working with automotive companies, and this is a very logical extension, combining our experience and products with Penske Racing’s leadership in motorsports and its quest for continuous improvement and realized results."
Nikon Metrology is one of the largest global providers of metrology products and value-added services, with one of the widest range of products.

"To have Nikon Metrology team with us helps Penske Racing continue its winning ways and further extend our footprint by expanding the boundaries in ways to improve," said John Moloney, General Manager of Penske Technology Group. "Our commitment to putting forth the most competitive and advanced race cars possible has been improved greatly with Nikon Metrology as a partner."


ABOUT PENSKE RACING
Penske Racing is one of the most successful teams in the history of professional sports. Competing in a variety of disciplines, cars owned and prepared by Penske Racing have produced 362 major race wins, including 15 Indianapolis 500 victories, 423 pole positions and 23 National Championships. For more information about Penske Racing, please visit www.penskeracing.com.

ABOUT NIKON METROLOGY
Nikon Metrology offers the most complete and innovative metrology product portfolio, including state-of-the-art vision measuring instruments complemented with optical inspection and mechanical 3D metrology solutions. These reliable and innovative products respond to the advanced inspection requirements of manufacturers active in consumer, automotive, aerospace, electronics, medical and other industries. For more information, visit www.nikonmetrology.com.


Small and Extremely Precise

With the MICURA coordinate measuring machine, Carl Zeiss is setting new standards in the compact class.


The MICURA coordinate measuring machine from Carl Zeiss meets user demands for smaller coordinate measuring machines that are as accurate as their larger relatives but offer a price advantage. This measuring machine is considerably more affordable thanks to the smaller measuring range. Nonetheless, with a measuring range of 500 x 500 x 500 millimeters, it is still the largest in this class. The parts in industrial manufacturing, such as artificial hips, gear wheels, optical lens elements and shafts with narrow tolerances, are becoming increasingly compact while the requirements on accuracy are rising. With MICURA, the measuring technology needed to complete these jobs is now available.

The measuring accuracy of MICURA is less than one micrometer. This is enabled by the VAST XT Gold probe which is able to continually scan surfaces at a speed of 200 measured points per second. VAST navigator scanning technology, which is optional for MICURA, is an ideal supplement. It adapts the scanning speed to the measuring job: where a simple contour and less precision are required, MICURA moves faster. When high precision is needed , MICURA moves somewhat slower.

During development of MICURA, Carl Zeiss emphasized stability and rigidity. The machine features ceramic guideways, air bearings on four sides and a large bearing base for all moving parts. Furthermore, this coordinate measuring machine has an easy-to-use control panel and a temperature sensor to capture the workpiece temperature. MICURA thus combines a number of performance features that were previously unaffordable for small operations and beginners to quality inspection. Several systems are already in operation. MICURA will be presented in Europe for the first time at the Control show Stuttgart in May 2012.

Creaform Celebrates 10 Years of Innovation in 3D Optical Measurement Technos and 3D Engineering Services


Lévis, February 22, 2012 – 2012 is a key and festive year for Creaform, leader in 3D portable optical measurement technologies and 3D engineering services, as the Canada-based company founded in 2002 reaches 10 years of innovation, growth and success.

Creaform from 2002 to 2012
Over the 10 past years, Creaform has grown from a 5-employee metrology services start-up to a 300-employee international company and major developer and manufacturer of 3D portable optical measurement technology and provider of 3D engineering services.

The company has shown a spectacular 79% compounded growth rate since 2002, and has sold more than 2500 systems in the past decade. Plus, the company has been awarded more than 30 prizes for its vision, innovation and success.

“Looking back at the past decade and considering the humble means that we had in 2002, I’m just in awe of what we have accomplished, and how fast we became a major player in the 3D optical measurement technology industry, says president Charles Mony. This might sound a bit cliché, but all of this was made possible by the innovation spirit and tireless work of our crew, the support of our partners and the confidence of our ever-growing client base. 10 years have gone by, and yet our drive, passion and determination remain absolutely intact. ”


Creaform in the future
According to Creaform’s quinquennial strategic plan, the company expects to increase its already fast-paced growth rate and also strengthen its position as a major player in the industry of metrology.  Furthermore, the company follows a very ambitious R&D program that will lead to the development and launch of several new technologies reflecting Creaform’s commitment to create innovative, accurate, reliable and easy to use devices.


About Creaform

Creaform specializes in 3D portable optical measurement technologies and 3D engineering services. We offer innovative solutions that cover the entire range of 3D applications, including 3D scanning, reverse engineering, inspection, design & engineering and FEA. Our wide range of products and services are intended for industries such as the automotive, aerospace and defence, consumer products, education, heritage preservation and manufacturing.

Creaform has developed and sells the Handyscan 3D line of portable, self-positioning handheld 3D scanners, along with the HandyPROBE portable arm-free CMM and the MetraSCAN optical CMM 3D scanner, two systems designed for inspection applications. The company has recently launched the MaxSHOT 3D optical coordinate measuring system that brings photogrammetry to all these technologies.

Creaform is an international company with offices in Québec City, Montréal, the United States, France, Germany, China, India and Japan. The company’s head office and Quebec-based offices have achieved 9001 : 2008 ISO certification in November of 2011.

New Training Videos Demonstrate Simple CMM Fixture Construction

FixLogix LLC has released two new training videos on their website and YouTube demonstrating simple concepts for building modular CMM fixtures. The quick training videos demystify basic CMMfixture construction, demonstrating fixture builds for stampings, forgings, a tube assembly with compound angles, and a molded plastic appliance part. The concepts shown are relevant to a wide variety of part shapes and materials, utilizing proven locating schemes such as the 3-2-1 method.

Olivet, Michigan (PRWEB) December 21, 2011
FixLogix LLC has released two new training videos on their website and YouTube demonstrating simple concepts for building modular CMM fixtures. The quick training videos demystify basic CMM fixture construction, demonstrating fixture builds for stampings, forgings, a tube assembly with compound angles, and a molded plastic appliance part. The concepts shown are relevant to a wide variety of part shapes and materials, utilizing proven locating schemes such as the 3-2-1 method.
FixLogix has changed the game for the CMM fixture industry. Legacy modular fixture systems for a 2’ x 2’ volume would typically cost 4K – 5K. A FixLogix system for the same volume costs $1400.00, and offers a highly functional system that for most applications is simpler to implement.. The kit is comprehensive such that the vast majority of part shapes and types can be adequately staged for inspection using the components in the standard kit. The content of the system is 95% + produced in Michigan.
FixLogix applies modern T-slot structures to modular CMM fixture technology. FixLogix T-slot fixture plates are marked with laser engraved reference scales along the T-slots, and each T-slot is also alpha-identified. This provides clear documentation of the fixture setup for easy repeat setups. A major advantage of the T-slot system is multi-axis infinite positioning of components. This simplifies fixture construction by easily allowing the fixture to be “built to the part”, placing locators where they don’t interfere with datums or critical part features. In turn this reduces the average time required to assemble part-holding fixtures.
The FixLogix component kit utilizes ¼-20 threaded components, and is cross-compatible with many other fixture systems, and is also cross-compatible with the FixLogix fixture systems for vision systems and optical comparators. The much lower cost point of the system allows for effective implementation in a variety of other coordinate metrology applications. Users of portable coordinate inspection systems such as articulating arms, white light, and laser scanners have found the fixture system to be very helpful. The system is available in English or Metric versions.
FixLogix LLC was formed in 2007 to produce and sell modular fixture systems for metrology, and other light duty part-holding applications. The company also produces modular fixture systems for vision systems, optical comparators, and laser scanners. The company maintains an E-commerce website, and takes most major credit cards.

Creaform: 3D Optical Measurement Technologies Specialist Achieved ISO 9001 : 2008 Certification

Creaform, leader in 3D portable optical measurement technologies and 3D engineering services, is proud to report that following a successful audit by Intertek, its Canada-based head office – that houses the departments of R&D, Production, Technical Support, etc. – has reached the ISO 9001 : 2008 certification as of November 2011. Intertek is a leading provider of quality and safety solutions serving a wide range of industries around the world. With more than 31,000 employees in over 100 countries, Intertek holds extensive global accreditations, recognitions, and agreements.

“After 10 years of accelerated growth and innovation, we felt it was time to ensure the quality of our products and services and the satisfaction of our clientele through a formal, organized and recognized system. We spent the last months implementing a Quality Management System (QMS) throughout head office, which reflects the continuous commitment of our employees towards high quality and thoroughness,” said Marco St-Pierre, VP of Innovation and Technologies and quality representative at Creaform.

Creaform’s Quality Policy
By taking a preventative approach through its rules and regulations, Creaform’s management and staff undertake to meet the standards of the company’s quality management system while continually striving to make it more efficient, with a view to ensuring total customer satisfaction.

Creaform’s Quality Management System
Creaform has implemented and maintains a quality management system that meets ISO 9001 standards. The QMS reflects the interconnectedness of the company’s processes and allows for ongoing improvement according to the PDCA (Plan-Do-Check-Act) management principle.
Creaform specializes in 3D portable optical measurement technologies and 3D engineering services. We offer innovative solutions that cover the entire range of 3D applications, including 3D scanning, reverse engineering, inspection, design & engineering and FEA. Our wide range of products and services are intended for industries such as the automotive, aerospace and defence, consumer products, education, heritage preservation, manufacturing, medical care and multimedia.

Creaform has developed and sells the Handyscan 3D line of portable, self-positioning handheld 3D scanners, along with the HandyPROBE portable arm-free CMM and the MetraSCAN optical CMM 3D scanner, two systems designed for inspection applications. The company has recently launched the MaxSHOT 3D optical coordinate measuring system that brings photogrammetry to all these technologies. Moreover, the company offers the Creaform 3D Body Digitizers line-up.

Creaform is an international company with offices in Québec City, Montréal, the United States, France, Germany, China, India and Japan. The company’s head office and Quebec-based offices have achieved 9001 : 2008 ISO certification in November of 2011.

Hexagon Metrology presents efficient measuring solutions at EuroMold


Hexagon Metrology and some of its versatile measuring solutions will be on show at EuroMold 2011, the World Fair for Mould Making and Tooling, Design and Application Development.

At EuroMold 2011 in Frankfurt/Main, Hexagon Metrology will be presenting a wide range of products for every industrial metrology application, in particular mould making and tooling, design and application development, at Booth M46, Hall 8. Hexagon Metrology is a long-established and reliable partner in these fields.
Portable coordinate measuring machines from Hexagon Metrology are efficient measuring solutions for components of all sizes. Customers can benefit from enormous time and cost savings by simply being able to take the measuring system to where it's needed.

In the field of portable metrology, Hexagon Metrology is exhibiting the ROMER Absolute Arm, the most precise ROMER coordinate measuring machine. The new ROMER measuring arm, the first to be equipped with absolute encoders, greatly simplifies the process of measuring. With this technology, there is no need to initialise all the encoders, as was previously the case with every measuring arm – the user simply switches the measuring machine on and starts to measure.

At this year's EuroMold, Hexagon Metrology is also presenting the new generation of 3D white-light measuring systems under the Cognitens brand: the Cognitens WLS400M manual and the Cognitens WLS400A automatic systems use digital stereo-vision technology to capture high-precision 3D data. This technology finds worldwide applications, especially in the automotive industry, and provides rapid quality control.

A further highlight is the Leica Absolute Tracker AT901. This instrument is the heart of a portable high-performance measuring system. When used in conjunction with optical or tactile hand- or robot-guided sensors, such as the Leica T-Probe or the Leica T-Scan, the Leica Absolute Tracker AT901 transforms into a metrological multitalented performer.
Hexagon Metrology is also showing the DEA GLOBAL Silver, which is quicker, measures more accurately and is easier to handle than ever before. Scanning throughput has been increased by up to 35% compared with the previous models. Optimised movement algorithms, upgraded software and a new controller have produced still more productivity.
The Hexagon Metrology booth will also provide visitors with the opportunity of viewing TESA precision measurement instruments and TESA measuring machines (including TESA Micro-Hite height gauges and TESA Micro-Hite 3D, TESA Scan).

Also on view are m&h Inprocess metrology equipment as well as various probe systems and the latest version of the 3D Form Inspect software. This software is the proven measuring solution for the mould making and tooling industry, and allows all sides and all axes of geometric and other shapes to be measured and recorded directly on the machine tool. This saves time and enhances quality.

Further information is available on our web site: www.hexagonmetrology.com/news

Hexagon Metrology Relocates Michigan Precision Center

Company Growth and Market Demands Drive Move

North Kingstown, RI – November 1, 2011 – Hexagon Metrology today announced the relocation of its Michigan Precision Center to a purpose built, state-of-the-art facility in Wixom, MI. Located in a campus-like setting, Hexagon’s new 26,000 sq. ft. office and distribution warehouse includes a spacious calibration lab and enhanced portable metrology training facilities. The new Wixom Precision Center is 35 miles northwest of downtown Detroit, and the high-tech office space offers greater energy efficiency, modern building systems, and convenient freeway access for customers. The Precision Center will house over 50 employees with an additional 110 service engineers based and dispatched from this office.

Hexagon Metrology’s new facility is located in Wixom Technology Park at 48443 Alpha Drive, Suite 100, Wixom, MI 48393. The company’s existing fax and telephone numbers remain unchanged. A customer open house is being planned for the spring of 2012. 

About Hexagon Metrology, Inc. 
Hexagon Metrology serves the high precision measurement and inspection needs of worldwide manufacturers with its extensive line of metrology hardware, software, accessories and customer services. The company's name-brand portfolio of quality assurance products include Brown & Sharpe, Cognitens, Leica Geosystems, ROMER, Sheffield, PC-DMIS, DEA, Leitz and TESA. Hexagon Metrology has an unrivaled installed base of more than 1.5 million handheld, stationary and portable measurement devices, and over 35,000 seats of PC-DMIS metrology software. More information is at http://www.HexagonMetrology.us

Hexagon Metrology is part of Hexagon (Nordic exchange: HEXA B). Hexagon is a leading global provider of design, measurement and visualization technologies. Hexagon’s customers design, measure and position objects, and process and present data, to stay one step ahead of a changing world. Learn more at www.hexagon.com.  

CRYSTA-Apex S CMM Offers Enhanced Performance


Doubles effective measuring range at a given tolerance, compared to typical CMMs


(Mitutoyo: Aurora, IL) -- The new CRYSTA-Apex S coordinate measuring machine (CMM) from Mitutoyo brings new levels of performance and economy to the 1.7 μm class of CNC coordinate measuring machines (CMMs).


With a maximum error of MPEE = (1.7 + 3L/1000) μm, the CRYSTA-Apex S more than doubles the effective measuring range at a given measurement tolerance as compared to typical CMMs in its class. Additionally, the CRYSTA-Apex S drive features high-speed (max 519 mm/s) and high acceleration (max 2,309 mm/s2). These advances result in higher throughput for greater productivity and lower total owning and operating costs.

The CRYSTA-Apex S uses the new UC-400 controller to manage digital servo-system control loops for position, speed, and current. This makes it easy to implement various types of control algorithms. Additionally, the digital servo system has a wide dynamic range and is highly resistant to drift over time.

Extreme rigidity helps the CRYSTA-Apex S maintain accuracy. The Y-axis guide rail is integrated into one side of the granite surface plate. Precision air bearings located on the bottom, front, rear, and upper surfaces of the X-axis slider minimize vibration and ensure stability even during high-speed, high-acceleration operation.

Accuracy is further enhanced by an advanced temperature compensation system. This consists of a thermometer unit that measures the temperatures from thermal sensors located on the scale units of the CMM main unit and from a set of workpiece thermal sensors. Temperature data are transferred to the UC-400 machine controller for thermal compensation. For proper workpiece compensation, the thermal expansion coefficient of the workpiece material is entered by the user; since the material of scale units of the CMM is constant, this expansion coefficient is permanently stored in the temperature unit.

The CRYSTA-Apex S supports a wide range of probes that offer increased capabilities, including the MPP-310Q scanning probe that collects cloud point data at speeds of up to 120 mm/s. Other probes suited for screw-depth measurement, ultra-small diameter measurement, and noncontact measurement are also supported.

Available software options enable the CRYSTA-Apex S to tackle a wide variety of measurement applications. Software packages include GEOPAK, a high-functionality, general-purpose measurement program that is at the heart of Mitutoyo controlled open system for modular operation support (MCOSMOS) software. MCOSMOS supports virtually every CAD format while providing routines for in-line measurement, data feedback, and process management.

Additional software supported by the CMM include: CAT1000S for freeform surface evaluation; CAT1000P, an offline teaching program; SCANPAK, for contour measurement; and a range of programs supporting laser and vision probes. CRYSTA-Apex S provides USB communications for connectivity. Additionally, CRYSTA-Apex S supports MeasurLink STATMeasure Plus, Mitutoyo’s proprietary statistical-processing and process-control program.

MeasurLink STATMeasure Plus performs statistical analysis and provides real-time display of measurement results for statistical process control (SPC) applications. The program can also be linked to a higher-level network environment for enterprisewide functionality.

Hexagon Metrology Announces Free Webinar on PC-DMIS 2011 MR1


October 18, 2011 – North Kingstown, RI – Hexagon Metrology, Inc. today announced a free live webinar on the release of PC-DMIS 2011 MR1 to be held on Thursday, October 27, 2011 from 11:30 am to 12:00 pm eastern daylight time. This seminar will feature live demonstrations of software enhancements as well as a step-by-step workflow to maximize programming efficiency. The webinar signup page contains the complete details and system requirements: https://www1.gotomeeting.com/register/471543393

Shaun Wissner, a Software Marketing Specialist for Hexagon Metrology, and an experienced PC-DMIS trainer, will present the session using live screen capture so viewers can follow along. During the 30 minute webinar, Shaun will show users how to create inspection routines using embedded GD&T, how to utilize new AutoFeature Scanning Strategies, new automatic file recovery, and much more.

A live question and answer session will follow the presentation. Archived versions of the webinar including a new interactive transcript feature are posted within two weeks of the live event at www.PC-DMIS.com.

About Hexagon Metrology


Hexagon Metrology serves the high precision measurement and inspection needs of worldwide manufacturers with its extensive line of metrology hardware, software, accessories, and customer services. The company's name-brand portfolio of quality assurance products include Brown & Sharpe, Cognitens, Leica Geosystems, ROMER, Sheffield, PC-DMIS, DEA, Leitz, and TESA. Hexagon Metrology has an unrivaled installed base of more than 1.5 million handheld, stationary and portable measurement devices, and over 35,000 seats of PC-DMIS metrology software. More information is at www.HexagonMetrology.us.

The company is a business unit of Hexagon AB (Stockolm, Sweden), a publicly-traded company (Nasdaq OMX Stockholm: HEXA B). The Hexagon group consists of nearly 11,000 employees located in 42 countries. 

Creaform Launches the MaxSHOT 3D Optical Coordinate Measuring System


New photogrammetry camera enhances Creaform technology product offering
Creaform, leader in portable 3D optical measurement technologies, is proud to introduce the latest addition to the wide range of technologies it develops and manufactures, the MaxSHOT 3D optical coordinate measuring system.
The MaxSHOT 3D adds the accuracy and speed of photogrammetry to the wide range of applications already possible with Creaform technologies, most especially when it comes to larger parts. It combines the MaxSHOT 3D photogrammetric video camera and the VXshot processing software.
"We are excited about this new system, since it reflects perfectly our commitment to high accuracy and reliability, says Creaform's president Charles Mony. The MaxSHOT 3D system brings photogrammetry to a whole new level in terms of affordability, ease of use and accessibility. With the MaxSHOT3D, we will indisputably strengthen our position and grow our market share in metrology-grade technologies on the international basis".
Features and Benefits
As product director Jean-François Larue stresses out, "our main goal was to come up with the most user-friendly photogrammetry software that ever existed to support our MaxSHOT 3D optical coordinate measurement system. We are extremely proud to present the metrology/ quality control community with an innovative software that is very simple to operate. Featuring real-time visualization and validation of acquired data and an entirely guided step-by-step operation, it allows even those new to photogrammetry to quickly and easily generate a high accuracy positioning model of an object."
In concrete terms, using the MaxSHOT 3D with a Handyscan 3D self-positioning scanner, a MetraSCAN optical CMM 3D scanner or a HandyPROBE arm-free CMM translates into shorter measuring time on larger parts, accelerated positioning of the device around the part and higher measurement accuracy, which ultimately leads to reduced production costs and increased efficiency.
The MaxSHOT 3D will be introduced to the public at EMO metalworking tradeshow in Hanover (Germany) on September 19th, and at Quality Expo in Chicago (USA) on September 20th.
About Creaform
Creaform specializes in 3D portable optical measurement technologies and 3D engineering services. We offer innovative solutions that cover the entire range of 3D applications, including 3D scanning, reverse engineering, inspection, design & engineering and FEA. Our wide range of products and services are intended for industries such as the automotive, aerospace, defence, consumer products, heritage preservation and manufacturing.
Creaform has developed and sells the Handyscan3D line of self-positioning 3D scanners, along with the HandyPROBE portable arm-free CMM and the MetraSCAN optical CMM 3D scanner, two systems designed for inspection applications. It has recently launched the MaxSHOT3D optical coordinate measuring system that brings photogrammetry to all these technologies.
Creaform is an international company with offices in Québec City, Montréal, the United States, France, Germany, China, India and Japan.
SOURCE Creaform

RENISHAW : announces more new products for EMO Hannover 2011

Renishaw, the global engineering technologies company, is announcing more new products that will be demonstrated at the EMO Hannover exhibition taking place in Germany, from 19th - 24th September. These include touch probes and software systems that will aid process control on CNC machine tools and a new surface finish measurement probe for co-ordinate measuring machines (CMMs).

These new metrology products will be demonstrated alongside other significant products already announced, including a radical new alternative to traditional dedicated gauging, a new range of additive manufacturing technologies and a 5-axis probe for CMMs.

New system allows multiple tool setting and inspection probes on CNC machine tools

At EMO Hannover, Renishaw is introducing significant new additions to its range of radio transmission probe systems, including an interface that allows multiple probe installations on the same machine tool, and a new compact tool setting probe with radio signal transmission which is ideal for larger machines.

The new RMI-Q radio transmission interface allows up to four separate tool setting or spindle-probes with radio transmission to be operated on the same CNC machine, making it an excellent choice for fitment onto CNC machining centres, or machines with rotary tables or twin pallets. Renishaw's new RTS contact tool setting probe with radio transmission is a robust, compact and cable-free product which does not restrict table movement. It offers users fast and accurate tool measurement, including tool length and diameter of milling cutters, twist drills and end mills, plus broken tool detection.

New version of PC based probing software for machining centres

Visitors to EMO 2011 will see that Productivity+™ is a unique software solution for the integration of measurement and process control functionality into CNC machining programs. Providing significant advantages over traditional methods, Productivity+ eliminates the requirement for the manual addition of probing cycles into G-code, instead using ‘point and click' feature selection from imported solid models within an interface immediately familiar to existing CAM users.

Already the most powerful tool available for using on-machine measurement to control manufacturing processes, Productivity+ version 1.90, available in autumn 2011, builds further on existing functionality and flexibility and includes more features for Constructed Statements, enhanced multi-axis capability, improved reporting capability, and more Custom Macro functionality.

New sensor allows fully automated surface finish measurement on CMMs

Renishaw has added a new probe option for its revolutionary REVO® five-axis measurement system, which for the first time, allows surface finish inspection to be fully integrated within CMM measurement routines. With a measurement capability of 6.3 to 0.05 Ra, the SFP1 surface finish probe provides a unique ‘single platform' that will eliminate the need for hand-held sensors, or the necessity to move parts to costly dedicated surface finish measuring machines, reducing labour costs and inspection lead times. Visitors to EMO Hannover will see that CMM users will now be able to automatically switch between part scanning and surface finish measurement, with analysis all contained in a single measurement report.

NIKON METROLOGY, INC. TO PRESENT XTREME SCANNING INNOVATION BRIEF AT QUALITY EXPO

Nikon Metrology announced that Alex Lucas, Business Development Manager of Scanning Products, will be presenting the Xtreme Scanning Innovation Brief at the Quality Show in Chicago.  Over the past few decades, laser scanners have grown from a novelty research topic, to being a critical component of the design process.  Now they are the lynchpin to scores of manufacturers' rapid inspection needs. Nikon Metrology offers a host of scanners that collect point cloud data at blistering rates unlocking the true potential of laser scanners as they have grown from novelty to necessity. Real-life examples of how productivity has increased and costs reduced will be discussed.

This presentation will cover:
• Latest advancements in CMM & handheld scanners
• Advantages of laser scanners - Typical applications
• Nikon Metrology's product portfolios
• Video demonstration of Nikon Metrology's Focus Inspection software
Intended audience: Quality Engineers, Design Engineers, Manufacturing Engineers, Plant Managers, CMM Programmers and Operators, Articulated Arm Operators
About the Speaker:
Alexander Lucas, Business Development Manager, Nikon Metrology, Inc.

Alexander Lucas is a Business Development Manager for Nikon Metrology, Inc. Having started with the company after graduating from the University of Michigan's College of Engineering, Lucas has had an opportunity to become proficient at a variety of metrology systems under the Nikon Metrology umbrella.  He is also quite skilled at imparting his knowledge for maximum benefit!

FARO Technologies, Inc. has announced the new version of its FARO Gage portable 3D CMM, now with Bluetooth and new measurement software.


Bluetooth wireless technology allows users to inspect and transmit data up to 10m away – even through walls – without the need for cables. Bluetooth is the right technology for FARO Gage applications and produces faster set up, extended battery life, and lower power consumption.
 
Furthermore, the FARO Gage measurement software has been completely enhanced. Renamed CAM2 Gage, it features a much simpler and more intuitive user interface that makes it the ideal entry-level inspection software.
 
The CAM2 Gage software is FARO’s CAM2 solution for measuring basic geometry and building dimensions. It allows users to measure geometric features on parts and report the dimensions they need to control. Once users have measured one complete part, they can then repeat the same measurements on the next part with no additional effort. Users can also add images to their inspection plan and hand it over to any operator.
 
For more information, you can also visit: www.faroasia.com/Gage


ROMER Introduces New, Enhanced Non-Contact Tube Inspection Systems


Inspection Probes and Absolute Encoders Simplify Tube Measurement and Manufacturing Process

ROMER, a brand of Hexagon Metrology, Inc., today announced their new line of non-contact tube inspection systems. The enhanced product line provides solutions for a wide array of tube and wire bending applications including tube inspection, bend correction to reduce scrap, reverse engineering, and fixture verification. System enhancements focus on expanded flexibility, simplicity, and ease-of-use to increase shop productivity.

New to the system, a range of non-contact, infrared probes provide operator-assisted visual notification via a laser stripe indicating the measured area. The operator can view where data points are acquired on a tube or wire during the inspection process. The probes are interchangeable with traditional ball probes without the need for re-calibration, delivering true plug-and-play capability. Brackets, flanges, bosses or other geometric features can now be included in the measurement routine. Besides saving time, no re-calibration also provides an additional layer of error proofing in the field. As with ROMER’s legacy systems, the non-contact probing feature enables measurement of the most flexible tubes or wires from 4mm to 130mm in diameter, without risk of deflection.

Zvonimir Kotnik, Director of the Business Management group of Hexagon Metrology, Inc. sums up the new tube inspection product line, “The straightforward operation of the overall system guarantees simple, flawless operation. By making the measurement process easier for the operator, we have improved efficiency, accuracy, and productivity for the entire tube shop”.

ROMER’s tube inspection system is based on the patented ROMER Absolute Arm portable CMM. Proprietary absolute encoders are located in the arm’s primary axes, so the arm always knows the position of its joints. This eliminates antiquated homing procedures, so the operator can turn on the system and start measuring immediately. The Absolute Encoders provide probing volumetric accuracy down to ±0.023mm depending on the model. The articulating arm also features low profile, Zero-G counterbalance to stabilize its weight for one-handed operation and effortless control above and below its centerline.
ROMER’s tube inspection system utilizes the Data Overlay Camera System (DOCS) software platform. Pictures can be taken with the arm’s onboard digital camera, and DOCS overlays the tube wire frame onto the digital picture. This enables the inspection report to show exactly how the tube was supported or fixtured during measurement. DOCS communicates with most CNC bender interfaces, so corrected bend data can be sent directly to the CNC bending machine, reducing the process of trial and error associated with manual measurements. DOCS user training is generally 2 days as compared to 5 to 6 days for traditional CMM software.

About Hexagon Metrology, Inc.
Hexagon Metrology serves the high precision measurement and inspection needs of worldwide manufacturers with its extensive line of metrology hardware, software, accessories and customer services. The company's name-brand portfolio of quality assurance products include Brown & Sharpe, Cognitens, Leica Geosystems, ROMER, Sheffield, PC-DMIS, DEA, Leitz and TESA. Hexagon Metrology has an unrivaled installed base of more than 1.5 million handheld, stationary and portable measurement devices, and over 35,000 seats of PC-DMIS metrology software. More information is at http://www.HexagonMetrology.us

The company is a business unit of Hexagon AB (Stockholm, Sweden), Hexagon's is listed on the NASDAQ OMX Stockholm exchange (HEXA-B) and has a secondary listing on the SIX Swiss Exchange. The Hexagon group consists of more than 12,000 employees located in 43 countries, and net sales of about 2.2 billion Euro.

NVision Specialized Training Assists Navy's Reverse Engineering

Customized, on-site training provided by NVision, Inc. is helping a Naval Air Station (NAS) improve its reverse engineering process.

After experiencing significant frustration and sub-standard scanning results, the NAS contacted NVision, which regularly works with every branch of the U.S. military and specializes in providing scanning solutions and customized, on-site training in the use of laser scanners for reverse engineering. An NVision engineer traveled to the base and spent four days extensively training its personnel on site in the use of laser scanning equipment and software. "Our on-site training with actual parts is one of the reasons why NVision's work with the military continues to grow," says Colin Ellis, Engineering Manager at NVision. "NVision is unique in that we provide full turnkey solutions from start to finish including training instead of having clients purchase separate hardware, software, and training from different places, which happened in this case."

Engineers and machinists at the base regularly need to reverse engineer complex replacement parts for naval aircraft in order to keep the planes and helicopters in peak flying condition. Although this NAS purchased a 3D laser scanner for reverse engineering from another vendor a few years ago, the vendor's lack of a thorough training program limited the ability of its personnel to reverse engineer parts in military aircraft. Sadly, the original training was on parts completely unrelated to those used at an NAS facility and with software not suitable for the station's needs.

The NVision engineer initially had some difficulty using the base's scanning equipment due to its inherent limitations. These issues included a very small laser strip width, tiny stand-off distance, and limited depth of field. Thankfully he was he able to resolve all of the NAS's issues and concerns by providing the facility with two new high-speed portable workstation computers and extensive training on XOR software using the station's own parts and real-world scenarios.

"Fortunately, with NVision's superior level of on-site training and the XOR software, we were able to bring the NAS completely up to speed on reverse engineering their complex parts," says Ellis. "The base now plans to replace their current rudimentary and slow scanner with an NVision high-accuracy and wide-stripe scanner in order to speed up their reverse engineering process even more."

For more information, contact NVision, Inc., 440 Wrangler Dr, Suite 200, Coppell, TX 75019. Ph: 972.393.8000, Fax: 972.393.8002. E-mail: sales@nvision3d.com. Visit NVision's Web site at www.nvision3d.com.

About NVision
NVision, Inc. (www.nvision3d.com) was established in 1990 with one goal in mind: to provide customers with the highest accuracy non-contact optical measurement systems and services for Reverse Engineering and Inspection. Focusing our expertise on the aerospace, power generation, and oil/gas industries, NVision provides both contract scanning services and systems sales to companies throughout North America. Our elite team of engineers provides customers with an unmatchable level of experience and is able to advise and assist with the most difficult engineering challenges.

NVision's clients include industry leaders such as Alstom, Boeing, GE, Lockheed Martin, Lear, NASA, Porsche, Raytheon, Siemens, Toyota, and every branch of the U.S. military.

Creaform Releases New VXtrack Dynamic Tracking Module at CONTROL 2011

The new modules is part of Creaform’s VXelements proprietary 3D data acquisition software

Creaform, leader in portable 3D optical measurement technologies and 3D engineering services, will release its new VXtrack dynamic tracking software module during the 25th CONTROL international trade fair for quality assurance that will be held in Stuttgart, Germany, from May 3-6, 2011 (Hall 5, booth 5108).

VXtrack dynamic tracking module

Teamed with Creaform’s C-Track dual camera optical sensor, VXtrack dynamic tracking can be used to simultaneously and continuously measure positions and orientations in space with great precision. Combined with the HandyPROBE arm-free portable coordinate measuring machine (CMM), VXtrack provides a complete portable 3D measuring solution offering both probing inspection and dynamic measurement capabilities.

The VXtrack module has numerous applications like robot calibration and guidance, monitoring of complex assembly processes, real-time compensation of machining tool-generated errors and monitoring of deformations during testing and can be useful in various industries such as aerospace, automotive, robotics, biomechanics and non-destructive testing (NDT).

Benefits and main features

TRUaccuracy technology guarantees the highest precision, in the lab or on the shop floor and simultaneous measuring of a rigid set of reflectors allows for increased 6 DOF precision.

VXtrack has a measurement rate of up to 24,000 reflectors per second with oversampling, along with extendable measuring volume, real-time curve display, an API for interfacing with third-party applications and acquisition synchronization capability through external trigger input.

About Creaform

Creaform specializes in 3D portable optical measurement technologies and 3D engineering services. We offer innovative solutions that cover the entire range of 3D applications, including 3D scanning, reverse engineering, inspection, design & engineering and FEA. Our wide range of products and services are intended for industries such as the automotive, aerospace and defense, consumer products, education, heritage preservation, manufacturing, medical care and multimedia.

Creaform has developed and sells the Handyscan 3D line of portable, self-positioning handheld 3D scanners that generate highly-accurate 3D scanning data. Creaform also manufactures and sells the HandyPROBE fully portable arm-free CMM, and the MetraSCAN optical CMM 3D scanner, two systems designed for inspection applications. Moreover, the company offers the Creaform 3D Body Digitizers line-up.

Creaform is an international company with offices in Québec City, Montréal, the United States, France, Germany, China, India and Japan.

Werth's Image Processing Optical Measurement

The newly redesigned ScopeCheck Multi-Sensor Coordinate Measuring Machines offers full image processing with variable working distance.  This combination of optics, software, and lighting control provides consistent, automatic measurement over a run of parts with reflective variability.

The new design with the granite base mounted on a stand alone steel foundation increases the stability of the machine and allows for increased operating speeds.  Additional sensors such as touch and scanning probes, laser probes, and the tiny Werth Fiber Probe can be added for increased flexibility.  All sensors are calibrated to each other, fully integrated within the WinWerth software, and can be used interchangeably within the same measuring programs.


For more information contact:


Werth, Inc.

8 Custom Dr. s Old Saybrook, CT s 06475 USA
Tel: (860) 399-2445 s Fax: (860) 399-6784

NVision Scanner Helps Get Aircraft Accessories to Fit Right the First Time

NVision’s HandHeld laser scanner is being used by Lockheed Martin [NYSE: LMT] engineers at its Missiles and Fire Control business to assure the fit of accessories to aircraft exteriors and interiors is positioned perfectly the first time.

The NVision Handheld scanner is a powerful portable scanning device which is capable of capturing 3D geometry. The NVision HandHeld is attached to a mechanical arm that moves about the object, freeing the user to capture data rapidly and with a high degree of resolution.

NVision’s HandHeld scanner has helped Lockheed Martin engineers accurately measure millions of points by simply moving it over an aircraft’s surface, enabling perfect fits on first prototype iterations.

“The Handheld laser scanner is a perfect fit for this application because its ability to move freely around a part makes it possible to reverse engineer virtually any size or shape of part,” said Steve Kersen, President of NVision. The scanner is attached to a mechanical arm which moves about the object, freeing the user to capture data rapidly and with a high degree of resolution. An optional tripod provides complete portability in the field. Intuitive software allows full model editing, polygon reduction, and data output to all standard 3D packages.

“An important advantage of laser scanning is that it provides accurate measurements of parts ranging in scale from the entire exterior of a commercial helicopter down to very small components,” said Stephen Rocca, manager of Mechanical Laboratories at Lockheed Martin Missiles and Fire Control in Orlando, Fla. “Getting the fit correct the first time provides significant time and cost savings. Laser scanning has also improved the accuracy of the fluid dynamic models that we use to predict the effect of the accessories on flight performance, providing a safety advantage.”

In building aircraft accessories, it’s critical to determine the exact geometry of the aircraft which normally cannot be obtained from computer aided design (CAD) models because the exact configuration varies from aircraft to aircraft. For example, aircraft interiors are populated with cables and hydraulic lines that often do not show up or show up in a different position in the CAD model. In the past, conventional measuring instruments were used to physically measure the aircraft. For example, technicians would measure the body exterior, rotor, skids, windows and doors of a commercial helicopter.

This was a very tedious process because an individual measurement had to be taken for each point. There was never enough time to take enough points to fully define the geometry so technicians frequently had to take a best guess as to the exact surface contours. The result was that the prototype often had to be reworked to get it to fit the exterior. The inherent inaccuracies of the manual measurement methods used in the past meant that three or four prototype iterations were typically required to obtain a good match to the aircraft.

After NVision demonstrated the ability to obtain high levels of accuracy in laser scanning, Lockheed Martin purchased an NVision Handheld scanner for a production site in Alabama, and later, a second scanner, for its Orlando, Fla., manufacturing facility.

About NVision
NVision, Inc. (www.nvision3d.com) was established in 1990 with one goal in mind: to provide customers with the highest accuracy non-contact optical measurement systems and services for Reverse Engineering and Inspection. Focusing our expertise on the aerospace, power generation, and oil/gas industries, NVision provides both contract scanning services and systems sales to companies throughout North America. Our elite team of engineers provides customers with an unmatchable level of experience and is able to advise and assist with the most difficult engineering challenges.

NVision’s clients include industry leaders such as Alstom, Boeing, GE, Lockheed Martin, Lear, NASA, Porsche, Raytheon, Siemens, Toyota, and every branch of the U.S. military.