Showing posts with label CMM Programmer. Show all posts

The American National Standards Institute (ANSI) Approves New Quality Information Framework (QIF) v 2.0 Standard


New QIF™ V2.0 Standard:  A Major Breakthrough for Manufacturing Quality
Provides Complete & Accurate MBD along with many other enhancements for the Metrology Industry


Burleson, Texas, USA November 23, 2014 — The (DMSC, Inc.) Dimensional Metrology Standards Consortium announced today the American National Standards Institute (ANSI) has approved QIF v 2.0 (Quality Information Framework, version 2.0) as an American National Standard.  This new standard enhances the previous ANSI Standard, QIF V1.0 containing quality planning and measurement results, by providing a complete and accurate 3D product definition with semantic geometric and dimensional tolerances, definitions for measurement resources, template for measurement rules, and statistical functionality.  All of this to satisfy the digital interoperability needs for a wide variety of use cases including feature-based dimensional metrology, quality measurement planning, first article inspection, and discrete quality measurement.

On December 19th, 2013, The ANSI Board of Standards Review (BSR) approved QIF v1.0 as an American National Standard. This new standard provides, quality measurement planning (QIF Plans), first article inspection (QIF Results), and discrete quality measurement.  

QIF v2.0 resolves model-based metrologies primary “pain point,” which is obtaining a complete and accurate 3D product definition with semantic geometric and dimensional tolerances (QIF MBD). It provides cost effective XML exchange of product definition with various conformance levels of semantic PMI (e.g., GD&T) that satisfies many CAD to model-based metrology use cases.  QIF v2.0 also provides a way to define and apply measurement resources (QIF Resources), measurement rules (QIF Rules), and statistics (QIF Statistics) towards generating and communicating feature-based measurement plans based upon a plant, department, or supplier’s measurement resources and rules defined by a company and/or by part type.  QIF models include quality characteristics and measurement features as defined in the ASME Y14.5 specification and the Dimensional Measuring Interface Standard (DMIS).

ANSI approval of QIF v2.0 indicates that QIF has attained a consensus approval from a large number of subject matter experts in the digital metrology industry.  (See “About DMSC” below.) The QIF standard was designed to meet the highest industry requirements and to satisfy technological gaps that have traditionally cost industry hundreds of millions of dollars annually. The DMSC has met, and continues to meet the need for urgently required national standards in quality measurement in a timely fashion.   ANSI’s accredited Standards Developing Organizations (SDOs) operate in accordance with national and often international guidelines, and have been verified by government and peer review assessments. 
To find more information about the QIF standards please visit the QIF website at www.qifstandards.org.  To obtain your no-cost copy of the standard please send a request via email to bsquier@dmis.org.

"I am proud of our standards community and the work that we have accomplished with this new standard. This doesn’t replace DMIS (Dimensional Measurement Interface Standard) but it compliments and can harmonize with it. This new standard infrastructure is expandable to include every aspect of the Quality Information Framework, thus the name. Once adopted by the software vendors, this will allow us to properly use digital models with all the engineering requirements and quickly produce inspection and measurement plans throughout our supply chain (micro and macro), conduct inspections and measurements, then analyze and report in standard formats via AS9102 or PPAP files. This will be a huge savings throughout every manufacturing industry in our environment without any cost to the software vendor or user." said Ray Admire, DMSC Treasurer and Chairman of the Quality Measurement Standards Committee."

Manufacturing quality digital information incompatibilities are costly and affects everyone: vendors, suppliers, users, and customers.  And the digital metrology community has lacked an enterprise-wide standards solutions, UNTIL NOW, QIFv2.0, a superior standards-based digital interoperability has been ANSI approved.  Furthermore the QIF enables Manufacturing Quality to join the Model-Based Enterprise next generation of doing business.” said DMSC President Curtis Brown.


About DMSC
The Dimensional Metrology Standards Consortium (DMSC, Inc.), is an ANSI Accredited Standards Developing Organization, as well as an A-Liaison to ISO TC 184/SC1.  QIF has been developed and demonstrated with support from: Applied Automation Technologies, Boeing, Capvidia, DISCUS, Hexagon Metrology, Honeywell FM&T, InfinityQS, Innovalia Metrology , Inspec Software Corporation, IPI Solutions, John Deere, Kotem, Lockheed Martin, Metrology Integrators, Metrosage, Mitutoyo America, National Institute of Standards and Technology (NIST), Nikon Metrology, Origin International, PAS Technology, Pratt Whitney, PTC Solutions, Quality Vision International, Renishaw, Rolls Royce, Siemens PLM Software, Systems Insights, and Zeiss. 

These are many of the same experts who continue to maintain the Dimensional Measuring Interface Standard (DMIS).


QIF is a registered trademark of the DMSC.   © 2014 Dimensional Metrology Standards Consortium
The CMM Handbook Version 6

CMM Quarterly Publications announces the newest version of The CMM Handbook. This version, version 6, has added an expanded GD&T section, a complete section on Profile, and more in-depth articles on CMM methodology.


Now take your CMM knowledge to a higher level with The CMM Handbook and accompanying videos. With expanded explanations and examples, this book will add to your knowledge of how the CMM is calculating your measured results. 

This book is not a training manual on a specific software but an educational resource.


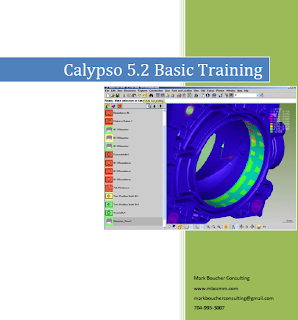
CMM Quarterly Publications Releases the Calypso 5.2 Basic Training Manual

CMM Quarterly Publications announces the release of a new training manual covering the changes made to the 5.2 release.

This manual will assist you in becoming a qualified programmer using Calypso 5.2

To purchase this manual click here

Volkswagen Orders Carl Zeiss CMM for New U.S. Plant

Carl Zeiss IMT is proud to announce the extension of the long-time partnership with German car manufacturer Volkswagen AG. Carl Zeiss IMT has been named by Volkswagen Group of America as the supplier for coordinate measuring machines (CMMs) used to ensure the dimensional quality of car bodies for a midsize sedan.

Volkswagen is currently building a new plant in Chattanooga, Tennessee. This facility will be dedicated to an environmentally-friendly range of vehicles, and the new manufacturing plant itself will be equipped with many energy efficient initiatives. Volkswagen expects to employ around 2,000 people. Full production is scheduled to start in 2011.

Click here to read entire article

The Coordinate Measuring Machines Role In Precision Machining

There is no doubt that the current economy has impacted the health of machining industry throughout the world. The smaller demand for machining products is taking its toll on some machine shops that are not able to find clever ways to operate effectively and efficiently. Some shops are continuing to perform at high levels, and are not experiencing the situation as other have been required to.

There is no secret why some machine shops are adapting to this change and are able to maintain profit even during these difficult times. The best machine shops are finding ways to be more precise. Sure. Precision craft is what most machine shops have prided themselves on for a long time, but the shops that are doing well today are expanding the meaning of this precision into the ways they are running the business. More often than not, this precision in business management means the addition of some type of technology.

The growth in machining is in the field of precision machining. With the automotive industry not performing as it once did, the old machine ships that once were able to press and machine parts within reasonable specifications are now understanding that they need to switch operations in order to stay competitive. Precision machining, that is machining that operates within a tiny fraction of an inch, and has fine minuscule tolerances, is now in high demand. This is due to the fact that many industries such as the alternative energy field need very small tolerances.

Aberlink unveils CMM lease scheme


11/08/2009

UK CMM specialist Aberlink is offering its machines on lease.Aberlink's flexible leasing scheme gives customers the option of purchasing the leased product outright at any point, with the value of the monthly payments made, up to a maximum value of 80 per cent of the original price, counting towards the purchase.

This initiative means that the company's comprehensive range of CMMs can now be leased for as little as £357/month.

WENZEL GEAR TEC INTRODUCES NEW INOVA COMPACT

WENZEL GEAR TEC INTRODUCES NEW INOVA COMPACT 4-AXIS FULLY-AUTOMATIC CNC GEAR MEASURING MACHINE FOR GEARS FROM 5 TO 270 MM

INOVA, the newest addition to the Wenzel Series of gear measuring machines is designed to utilize multiple scanning measuring probes including one for grind burn detection.


Wenzel Gear Tec displayed their new compact INOVA gear measuring machine for the first time at the Control Exhibition in Stuttgart, Germany in May, 2009.
INOVA is a completely new gear measuring machine design where the Z-axis with integral rotary table are positioned independently from the X and Y-axes. In addition, highly-accurate servo drives are used for all linear axes to provide a very high level of dynamic performance. Like all Wenzel CMMs and gear measuring machines (GMMs), Impala black granite is used for the guideways. An integrated pneumatic vibration dampening system isolates the machine base, eliminating the need for any special foundation.

The INOVA has the capability of using multiple scanning sensors including probes for detecting grind burn. A probe change rack feature has an integral protective cover insures the probes and sensors are organized and protected from dirt and damage.


Click here to read the entire article

CNC CMM PROGRAMMING SUPERVISOR


This is a key leadership position. The CNC Programming Supervisor should have a strong PC-DMIS background and experience with CNC (computer numerical controlled) Programming and ideally NC probing experience as well. We can train on the NC side so that is less important than the PC-DMIS. This can be a Programmer and a Manager, or combination. CNC tools have revolutionized the design process, allowing use of a number of different tools, combining the many into a single "cell", such as using a number of different machines with an external controller and human or robotic operators that move the component from machine to machine. PC-DMIS allows us direct and seamless integration with CAD data, eliminating translation and maintaining the original design intent throughout the measurement process. PC-DMIS provides comprehensive measurement routines for all part types, from the simple to the most complex. This is a key role, as it will allow manufacturing to quickly capture dimensional data, analyze it and act on it to reduce scrap, improve throughput and reduce costs.

Company Information (Specifics provided with receipt of a confidential resume)

The company produces UNMANNED VEHICLES – an exciting time, as the applications cover Homeland Security to Agricultural information gathering, etc.

The company is on the front end of contracts and fully immersed in ongoing contracts. They are willing to relocate candidates on both positions. This is best for people who have worked in smaller, entrepreneurial, dynamic, ever changing and ever creating cultures. They must have DoD experience. They will want to join a company where they can make their mark. They won’t be coming into a fully defined, multi-layer operation.

Please send resume to info@cmmquarterly.com and I will forward

CMMSite.com announces new distributor agreements

CMMSite.com, a subsidiary of CMM Quarterly, announces its new distributor agreements with ITP Styli and Fixlogix. CMMSite.com is quickly becoming the #1 resource site for the CMM/ Vision machine industry. CMMSite now offers a comprehensive line of styli and accessories. Thousands of items in stock for all probing systems M2 through M6. FixLogix modular CMM fixture system is attractive and highly functional at a fraction of the price of competing systems. Their patent-pending technology is one of the the best value on the market today.CMMSite.com will bring more distribution to the web site in order to meet the requests of coordinate measuring machine programmers who are looking for the best products available.

Links are provided on the front page of the CMMSite.com web site to purchase styli and fixture products. On the Fixlogix site you must register and following the link to their site.

Click here to view CMMSite.com

More about ITP and Fixlogix

ITP Styli

itpstyli is a North American corporation formed in partnership with itp GmbH, Germany. itstyli was created with the sole mission of fulfilling the needs of CMM, machine tool, and gear-measurement professionals who are looking for an easy and quick method to find and purchase a diverse range of high quality replacement styli, accessories and custom solutions, at lower cost. itp GmbH is a market leader in the replacement styli industry. Not only certified as a top performance supplier to major CMM, machine tool, and gear-measurement-instrument producers, itp has earned the business of customers worldwide and across all industry sectors. From automotive, aerospace, defense and machine tools to IT, itp has served applications where perfection, quality and exceptional performance are required.

Fixlogix

The FixLogix modular CMM fixture system is attractive and highly functional at a fraction of the price of competing systems. Our unique patent-pending technology is the best value on the market today.

To access these sites click on the links on the front page of CMMSite.com

Surface Normals

Issues When Programming From CAD When Using A CMM

By Mark Boucher, CMM Quarterly http://www.cmmquarterly.com/


There are several issues that arise when bringing a CAD model into your CAD based coordinate measuring machine (CMM) programming software. One of these issues has to do with surface normals (surface vectors). You can bring in a model and the entire model or a portion of that model is visible, but dark (Figure1), or certain sections are not visible at all. This problem arises from the surface vectors pointing in the opposite direction than your CAD system views them. You are looking at the back side of the surface. You must reverse the surface normal (Figure 2). If your software has this capability, you are looking for something similar to ‘reverse surface normals’. This will flip the surface so the front faces in the correct orientation for your software to view the surface.


All surfaces have a front and a back side; a CAD program must know which is which. How is this done? The model must somehow include information to specify the front of a surface. This is done by surface normals.

This is a line perpendicular to the front surface and beginning on that surface pointing away from the surface. Meaning it exists only on the side of the surface that is its front. The CAD system must have this information to shade the model properly. Those that
use a CAD system need this to drive the probe normal to the surface.

Direction vectors have been covered extensively by Richard Clark, his three part series was featured in CMM Quarterly (http://www.cmmquarterly.com/ ). Suffice it to say that these surface normals are what give you the direction vectors from CAD models when programming. If you do not use a CAD model to program then you must calculate the normal vector. Contact rcmetrology@yahoo.com for a Direction Vector Calculator.

When picking a feature off a CAD model the software will extract the normal vector from the CAD surface. As mentioned above you may have the ability to flip surface normals or you may have the ‘view surfaces from both sides’ option. Care must be given to this selection because the surface will be visible but the vector may point in the opposite direction you need to probe the part, your probing direction vector. Just know when viewing the vector after feature selection, that it is correct.
This article is copyrighted. Please contact Mark Boucher at info@cmmquarterly.com for permission to reprint.